
Notice
Recent Posts
Recent Comments
Link
| 일 | 월 | 화 | 수 | 목 | 금 | 토 |
|---|---|---|---|---|---|---|
| 1 | 2 | 3 | 4 | 5 | ||
| 6 | 7 | 8 | 9 | 10 | 11 | 12 |
| 13 | 14 | 15 | 16 | 17 | 18 | 19 |
| 20 | 21 | 22 | 23 | 24 | 25 | 26 |
| 27 | 28 | 29 | 30 | 31 |
Tags
- 웹프로그래밍
- get요청
- 타이타닉예제
- PM코스 후기
- 자바스크립트
- CSS
- 항해99PM코스
- 항해99 PM코스
- PM부트캠프 후기
- 파이썬
- requests패키지
- 데이터분석
- PM코스후기
- jQuery
- 제이쿼리
- temp_html
- fetch
- 로컬개발환경
- 항해99
- HTML
- 당뇨병발병률예제
- PYTHON
- 서비스기획부트캠프
- venv설치
- js
- javascript
- 서비스기획
- IT부트캠프후기
- 직무부트캠프후기
- 프로덕트매니저
Archives
- Today
- Total
노엘의 샴슈
[6] Javascript, jQuery : 서버-클라이언트 통신, Open API, JSONVue, Fetch() 함수 본문
Programming/WEB
[6] Javascript, jQuery : 서버-클라이언트 통신, Open API, JSONVue, Fetch() 함수
알 수 없는 사용자 2023. 7. 15. 21:081. 서버-클라이언트 통신 이해하기
1) 서버 ➡️ 클라이언트 : JSON 데이터
더보기


1) 서울시 미세먼지 Open API
- http://openapi.seoul.go.kr:8088/6d4d776b466c656533356a4b4b5872/json/RealtimeCityAir/1/99
- 그냥 열어보면 데이터가 보기 좋지 않게 뜰 것이다. 그래서 Json형으로 바꿔주는 아래 확장자를 추가한다!
2) JSONVue 설치하기
- https://chrome.google.com/webstore/detail/jsonview/chklaanhfefbnpoihckbnefhakgolnmc?hl=ko
3) 다시 데이터 확인해보기
- 그럼 아래처럼 데이터가 보기 좋게 정리되어 뜨는 것을 확인할 수 있다!
2) 클라이언트 ➡️ 서버 : GET/POST 요청
더보기
- GET 요청 : 데이터를 조회(Read) 할 때
▫️google.com/search?q=아이폰&sourceid=chrome&ie=UTF-8
google.com의 search API
q=아이폰 (검색어) / sourceid=chrome (브라우저) / ie-UTF-8 (인코딩 정보)
▫️? : 여기서부터 전달할 데이터가 작성된다는 뜻
▫️& : 전달할 데이터가 더 있다는 뜻
- POST 요청 : 데이터를 생성(Create), 변경(Update), 삭제(Delete) 요청할 때
➡️ 지금은 Get 방식을 활용할 예정!
2. Fetch
1) 기본 문법
더보기
fetch("URL").then(res => res.json()).then(data => {
		console.log(data)
})- fetch("URL") : URL으로 웹 통신 요청을 보낸다
- .then(res => res.json()) : 받아온 데이터를 res에 넣고, 이를 json()화 시킨다.
- .then(data => {}) : 그 값을 data라고 부르고 그 값에 대해서 다음 함수를 실행시킨다.
2) 간단하게 값 console에 찍어보기
더보기


<!doctype html>
<html lang="ko">
<head>
    <meta charset="UTF-8">
    <title>Fetch Prac1</title>
    <script src="https://ajax.googleapis.com/ajax/libs/jquery/3.5.1/jquery.min.js"></script>
		<script>
            fetch("http://spartacodingclub.shop/sparta_api/seoulair").then(res => res.json()).then(data => {
                console.log(data)
            })
		</script>
</head>
<body>
    <h1>Fetch Prac1</h1>
</body>
</html>
- 데이터가 RealtimeCityAir라는 key > row라는 key 안에 순서대로 딕셔너리로 들어가 있음을 볼 수 있다.
- 이제 그럼 이 data 값에서 'RealtimeCityAir'라는 키의, 'row'라는 키를 가진
그 아래 딕셔너리를 순서대로 넣은 리스트로 만들어보자
먼저 data['RealtimeCityAir']['row'] 값을 rows로 선언해준다. (선언을 안해주고 바로 안뽑힘)
그 다음 반복문을 활용해서 로그를 찍어준다.
<!doctype html>
<html lang="ko">
<head>
    <meta charset="UTF-8">
    <title>Fetch Prac1</title>
    <script src="https://ajax.googleapis.com/ajax/libs/jquery/3.5.1/jquery.min.js"></script>
		<script>
            fetch("http://spartacodingclub.shop/sparta_api/seoulair").then(res => res.json()).then(data => {
                let rows = data['RealtimeCityAir']['row']
                rows.forEach((a) => {
                    console.log(a)
                })
            })
		</script>
</head>
<body>
    <h1>Fetch Prac1</h1>
</body>
</html>- 그럼 요렇게 순서대로 데이터가 뽑힌 걸 볼 수 있다.
- 이번에는 이 중에서도 지역명과 미세먼지 수치만 뽑아보자.
<!doctype html>
<html lang="ko">
<head>
    <meta charset="UTF-8">
    <title>Fetch Prac1</title>
    <script src="https://ajax.googleapis.com/ajax/libs/jquery/3.5.1/jquery.min.js"></script>
		<script>
            fetch("http://spartacodingclub.shop/sparta_api/seoulair").then(res => res.json()).then(data => {
                let rows = data['RealtimeCityAir']['row']
                rows.forEach((a) => {
                    console.log(a['MSRSTE_NM'], a['IDEX_MVL'])
                })
            })
		</script>
</head>
<body>
    <h1>Fetch Prac1</h1>
</body>
</html>
3) 예제1 : 데이터 업데이트
더보기


- fetch로 데이터를 가지고 와서
- let rows = data['RealtimeCityAir']['row'] : 앞에 붙어있는 키값 두개를 없애주는 작업
- rows 안에 있는 각 개별 값들 하나하나에 대해서 반복문 돌려주기
- 지역명과 미세먼지 값을 변수에 넣어주고
- temp_html에 반복되어야할 내용을 저장한다음
- $("#id").append(temp_html) 로 해당 id에 붙여주기!!
- 맨 앞에는 empty()로 원래 있던 내용을 지워준다.
function q1() {
            $("#names-q1").empty()
            fetch("http://spartacodingclub.shop/sparta_api/seoulair").then(res => res.json()).then(data => {
                let rows = data['RealtimeCityAir']['row']
                rows.forEach((a) => {
                    gu_name = a['MSRSTE_NM']
                    gu_mise = a['IDEX_MVL']
                    let temp_html = `<li>${gu_name} : ${gu_mise}</li>`
                    $("#names-q1").append(temp_html)
                })
            })
        }
<!doctype html>
<html lang="ko">
<head>
<meta charset="UTF-8">
<title>Fetch Prac2</title>
<script src="https://ajax.googleapis.com/ajax/libs/jquery/3.5.1/jquery.min.js"></script>
<style type="text/css">
div.question-box {
margin: 10px 0 20px 0;
}
.update_btn {
margin-top: 20px;
padding: 10px 20px 10px 20px;
background-color: goldenrod;
border-color: transparent;
border-radius: 10px;
font-weight: bold;
}
</style>
<script>
function q1() {
$("#names-q1").empty()
fetch("http://spartacodingclub.shop/sparta_api/seoulair").then(res => res.json()).then(data => {
let rows = data['RealtimeCityAir']['row']
rows.forEach((a) => {
gu_name = a['MSRSTE_NM']
gu_mise = a['IDEX_MVL']
let temp_html = `<li>${gu_name} : ${gu_mise}</li>`
$("#names-q1").append(temp_html)
})
})
}
</script>
</head>
<body>
<h1>Fetch Prac2</h1>
<hr/>
<div class="question-box">
<h2>서울시 OpenAPI(실시간 미세먼지 상태)를 이용하기</h2>
<p>모든 구의 미세먼지가 표기됩니다</p>
<p>업데이트 버튼을 누르면 데이터가 업데이트 됩니다</p>
<button class="update_btn" onclick="q1()">UPDATE!</button>
<ul id="names-q1">
<li>중구 : 82</li>
<li>종로구 : 87</li>
<li>용산구 : 84</li>
<li>은평구 : 82</li>
</ul>
</div>
</body>
</html>
4) 예제2 : 데이터 값에 따라 색 바꿔주기
더보기

- 미세먼지 값이 40 이상인 경우에는 글씨를 빨간색으로 바꿔보자
function q1() {
            $("#names-q1").empty()
            fetch("http://spartacodingclub.shop/sparta_api/seoulair").then(res => res.json()).then(data => {
                let rows = data['RealtimeCityAir']['row']
                rows.forEach((a) => {
                    gu_name = a['MSRSTE_NM']
                    gu_mise = a['IDEX_MVL']
                    let temp_html = ``
                    if (gu_mise >= 40) {
                        temp_html = `<li class="bad">${gu_name} : ${gu_mise}</li>`
                    } else {
                        temp_html = `<li>${gu_name} : ${gu_mise}</li>`
                    }
                    $("#names-q1").append(temp_html)
                })
            })
}- 중요한건 여기서는 temp_html을 먼저 빈 상태로 선언을 해주고
그 다음 if문을 돌면서 값을 넣어줬다는 점이다.
이렇게 하지 않고 if문 안에서 선언을 하면 append 함수를 실행할 때 temp_html이 선언이 안되었다고 뜬다! - 빨간색으로 style 을 지정해줄 때는 마찬가지로 클래스로 이름을 붙여주고
style 태그 안에 속성을 지정해주면 된다.
5) 예제3 : 따릉이 데이터 활용
더보기


- 시작 코드 : fetch로 데이터를 가져와서 콘솔에 찍어보자.
<!doctype html>
<html lang="ko">

<head>
    <meta charset="UTF-8">
    <title>Fetch Prac3</title>
    <script src="https://ajax.googleapis.com/ajax/libs/jquery/3.4.1/jquery.min.js"></script>

    <style type="text/css">
        div.question-box {
            margin: 10px 0 20px 0;
        }

        table {
            border: 1px solid;
            border-collapse: collapse;
        }

        td,
        th {
            padding: 10px;
            border: 1px solid;
        }
        .update_btn {
            margin: 20px 0px 20px 0px;
            padding: 10px 20px 10px 20px;
            background-color: goldenrod;
            border-color: transparent;
            border-radius: 10px;
            font-weight: bold;
        }
    </style>

    <script>
        function q1() {
            fetch("http://spartacodingclub.shop/sparta_api/seoulbike").then(res => res.json()).then(data => {
                console.log(data)
            })

                    }
    </script>

</head>

<body>
    <h1>Fetch Prac3</h1>

    <hr />

    <div class="question-box">
        <h2>서울시 OpenAPI(실시간 따릉이 현황)를 이용하기</h2>
        <p>모든 위치의 따릉이 현황이 보여집니다</p>
        <p>업데이트 버튼을 누르면 데이터가 업데이트 됩니다</p>
        <button class="update_btn" onclick="q1()">UPDATE!</button>
        <table>
            <thead>
                <tr>
                    <td>거치대 위치</td>
                    <td>거치대 수</td>
                    <td>현재 거치된 따릉이 수</td>
                </tr>
            </thead>
            <tbody id="names-q1">
                <tr>
                    <td>102. 망원역 1번출구 앞</td>
                    <td>22</td>
                    <td>0</td>
                </tr>
                <tr>
                    <td>103. 망원역 2번출구 앞</td>
                    <td>16</td>
                    <td>0</td>
                </tr>
                <tr>
                    <td>104. 합정역 1번출구 앞</td>
                    <td>16</td>
                    <td>0</td>
                </tr>
            </tbody>
        </table>
    </div>
</body>

</html>- 'getStationList' 키 > 'row' 키 > 리스트가 들어있음을 알 수 있다!
<script>
     function q1() {
          $('#names-q1').empty()
          fetch("http://spartacodingclub.shop/sparta_api/seoulbike").then(res => res.json()).then(data => {
              let rows = data['getStationList']['row']
              rows.forEach((a) => {
                  st_name = a['stationName']
                  rack_tot = a['rackTotCnt']
                  available_tot = a['parkingBikeTotCnt']
                  let temp_html = `<tr>
                                      <td>${st_name}</td>
                                      <td>${rack_tot}</td>
                                      <td>${available_tot}</td>
                                  </tr>`
                  $('#names-q1').append(temp_html)
              })
          })
      }
</script>
- 여기서 남은 거치대 수가 5개 이하인 경우 빨간색으로 표시해보자.
<script>
    function q1() {
        $('#names-q1').empty()
        fetch("http://spartacodingclub.shop/sparta_api/seoulbike").then(res => res.json()).then(data => {
            let rows = data['getStationList']['row']
            rows.forEach((a) => {
                st_name = a['stationName']
                rack_tot = a['rackTotCnt']
                available_tot = a['parkingBikeTotCnt']
                let temp_html = ``
                if (available_tot <= 5) {
                    temp_html = `<tr class="under">
                                    <td>${st_name}</td>
                                    <td>${rack_tot}</td>
                                    <td>${available_tot}</td>
                                </tr>`
                } else {
                    temp_html = `<tr>
                                    <td>${st_name}</td>
                                    <td>${rack_tot}</td>
                                    <td>${available_tot}</td>
                                </tr>`
                }
                $('#names-q1').append(temp_html)
            })
        })
    }
</script>
추가) 노엘피디아에 기온 추가하기
더보기

- 저번 노엘피디아 상태에서 기온 추가하기
- 자동 로딩 함수 + 날씨 API 코드 : 페이지를 로딩할 때 같이 실행되는 함수 정의하기
$(document).ready(function() {
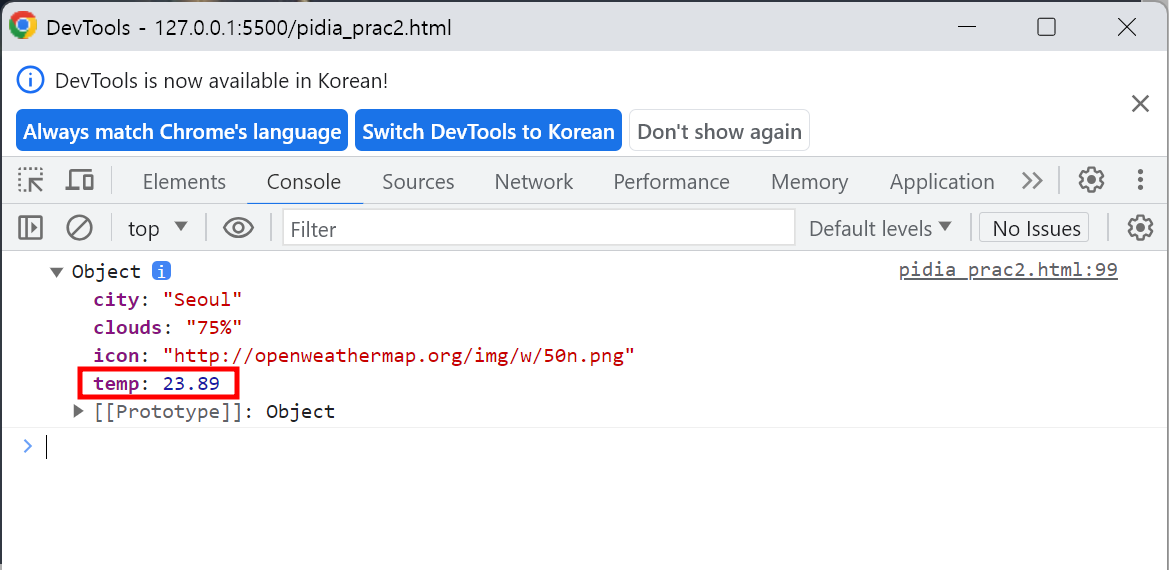
fetch("http://spartacodingclub.shop/sparta_api/weather/seoul").then(res => res.json()).then(data => {
console.log(data)
})
})
- 온도가 뜰 div 추가
글씨가 너무 작아서 <h3> 태그 안에 넣어줬고
<span>은 <div> 같이 빈 상자인데 줄바꿈 없이 inline으로 들어가는 태그다.
지금은 이 온도 값만 바꿔줄거기 때문에 span으로 숫자만 따로 묶어줬다.
<div> <h3> 현재 서울의 날씨 : <span id="temp">20</span>도 </h3></div>
- 콘솔에 찍히는 데이터 확인해보기 ➡️ data['temp'] 값만 가져오면 되겠다!
    <script>
        $(document).ready(function () {
            $("#temp").empty()
            fetch("http://spartacodingclub.shop/sparta_api/weather/seoul").then(res => res.json()).then(data => {
                let a = data['temp']
                let temp_html = `<span id="temp">${a}</span>`
                $("#temp").append(temp_html)
            })
        })
    </script>
<script>
$(document).ready(function() {
fetch("http://spartacodingclub.shop/sparta_api/weather/seoul").then(res => res.json()).then(data => {
// console.log(data)
let number = data['temp']
$('#temp').text(number)
})
})
</script>- 둘 다 같은 결과를 가져오지만, 아래가 더 간단하다.
'Programming > WEB' 카테고리의 다른 글
| [8] 파이썬 기초 : 크롤링, 웹스크래핑 기초 (0) | 2023.07.17 |
|---|---|
| [7] 파이썬 시작 + 기초 : python 설치, 기초 문법, requests 패키지 (0) | 2023.07.16 |
| [5] Javascript 기초 : jQuery 문법 (0) | 2023.07.14 |
| [4] Github에 웹페이지 배포하는 법, 사용법 : 페이지 배포 (0) | 2023.07.14 |
| [3] CSS 부트스트랩 활용 : 카드, 버튼, 인풋 그룹 넣기 (0) | 2023.07.14 |
'Programming/WEB' Related Articles
more


